


Having written about lifting and shifting a Console Application, I decided to mirror the scenario and describe how a similar method can be used to lift and shift a Windows Service to Microsoft Azure.
Moving a Service to Microsoft Azure
Every time I dig a little deeper into Azure, I’m amazed at how much there is to know. Having done a few projects with Cloud Services in the past, I thought it would be interesting to see if it was possible to lift and shift a Windows Service into an Azure Worker Role.
Lift and Shift: The action of moving a workload to a new environment, without altering the application’s code.
Prerequisites
☁ Tools
Using the Microsoft Web Platform Installer install the latest Microsoft Azure PowerShell with Microsoft Azure SDK.
☁ Microsoft Azure Account
In order to deploy your workload to Microsoft Azure, be sure to have an account. You can create a Free Trial Account on the azure.com website.
Creating a Worker Role without Visual Studio
A Worker Role is a role that is useful for generalized development, and may perform background processing for a Web Role. When you have a need for a background process that performs long running or intermittent tasks, you should use this role.
Let’s fire-up Windows PowerShell ISE and navigate to the folder where you want to create your Cloud Service. For this blog post, I created a new folder, demo-lift-and-shift, in my Documents.
C:\users\<user id>\Documents\demo-lift-and-shift-service
In the PowerShell console, execute the following commands.
# Create the Cloud Service
New-AzureServiceProject -ServiceName 'service-lift-and-shift' -Verbose

# Create the Worker Role
Add-AzureWorkerRole -Name 'ServiceWorkerRole' -Instances 1 -Verbose
These two commands will produce the following files and documents. This represents the Cloud Service project. It contains the configurations and the Cloud Service definition.

The ServiceDefinition.csdef was created by PowerShell when we executed the New-AzureServiceProject command. Then it was updated when we executed the Add-AzureWorkerRole. The following is the unchanged version of the service definition. Since it is missing a few pieces, I will show you what to change in order to be able to deploy your brand-new service to Microsoft Azure.
The ServiceDefinition.csdef file contains the metadata that is required by the Azure environment for the requirements of your cloud service, including what roles it contains. This file also contains configuration settings that apply to all instances. These configuration settings can be read at runtime using the Azure Service Hosting Runtime API. This file cannot be updated while your service is running in Azure.
<?xml version="1.0" encoding="utf-16"?>
<ServiceDefinition xmlns:xsd="http://www.w3.org/2001/XMLSchema" xmlns:xsi="http://www.w3.org/2001/XMLSchema-instance" name="service-lift-and-shift" xmlns="http://schemas.microsoft.com/ServiceHosting/2008/10/ServiceDefinition">
<WorkerRole name="ServiceWorkerRole">
<Startup>
<Task commandLine="setup_worker.cmd > log.txt" executionContext="elevated">
<Environment>
<Variable name="EMULATED">
<RoleInstanceValue xpath="/RoleEnvironment/Deployment/@emulated" />
</Variable>
<Variable name="RUNTIMEID" value="" />
<Variable name="RUNTIMEURL" value="" />
</Environment>
</Task>
<Task commandLine=".\startup.cmd > startup_log.txt" executionContext="elevated" />
</Startup>
<Endpoints>
<InputEndpoint name="HttpIn" protocol="tcp" port="80" />
</Endpoints>
<Runtime>
<Environment>
<Variable name="PORT">
<RoleInstanceValue xpath="/RoleEnvironment/CurrentInstance/Endpoints/Endpoint[@name='HttpIn']/@port" />
</Variable>
<Variable name="EMULATED">
<RoleInstanceValue xpath="/RoleEnvironment/Deployment/@emulated" />
</Variable>
</Environment>
<EntryPoint>
<ProgramEntryPoint commandLine="worker.cmd" setReadyOnProcessStart="true" />
</EntryPoint>
</Runtime>
</WorkerRole>
</ServiceDefinition>
Specify a Role (Virtual Machine) size
The size of the role determines the number of CPU cores, the memory capacity, and the local file system size that is allocated to a running instance. The following
- ExtraSmall (1 CPU, 768 MB RAM, 19 GB DISK)
- Small (1 CPU, 1.75 GB RAM, 224 GB DISK)
- Medium (2 CPU. 2.5 GB RAM, 489 GB DISK)
- Large (4 CPU 7 GB RAM, 999 GB DISK)
- ExtraLarge (8 CPU, 14 GB RAM, 2039 GB DISK)
Considerations to help you decide on the correct size for your workload
- Instances can now be configured to use a D-series VM. These are designed to run applications that demand higher compute power and temporary disk performance. D-series VMs provide faster processors, a higher memory-to-core ratio, and a solid-state drive (SSD) for the temporary disk. For details, see the announcement on the Azure blog, New D-Series Virtual Machine Sizes.
- Web roles and worker roles require more temporary disk space than Azure Virtual Machines because of system requirements. The system files reserve 4 GB of space for the Windows page file, and 2 GB of space for the Windows dump file.
- The OS disk contains the Windows guest OS and includes the Program Files folder (including installations done via startup tasks unless you specify another disk), registry changes, the System32 folder, and the .NET framework.
- The local resource disk contains Azure logs and configuration files, Azure Diagnostics (which includes your IIS logs), and any local storage resources you define.
- The apps (application) disk is where your .cspkg is extracted and includes your website, binaries, role host process, startup tasks, web.config, and so on.
More details about Virtual Machine and Cloud Service Sizes for Azure can be found in the official Azure documentation.
For this example we will use a Medium sized role (Virtual Machine) for our Cloud Service.
Replace
<WorkerRole name="ServiceWorkerRole">
By
<WorkerRole name="ServiceWorkerRole" vmsize="Medium">
Specify a Guest OS Version
Guest OS families and versions have a release date, a disabled date, and an expiration date. As of the release date, a Guest OS version can be manually selected in the management portal. A Guest OS is removed from the management portal on or after its “disabled” date. It is then “in transition” but is supported with limited ability to update a deployment. The expiration date is when a version or family is scheduled to be removed from the Azure system completely. Cloud services still running on a version when it expires will be stopped, deleted or force upgraded to a newer version, as detailed in the Azure Guest OS Supportability and Retirement Policy. Microsoft supports at least two recent versions of each supported Guest OS family.
Available Families as of December 2014
- FAMILY 4
Windows Server 2012 R2
Supports .NET 4.0, 4.5, 4.5.1, 4.5.2 - FAMILY 3
Windows Server 2012
Supports .NET 4.0, 4.5 - FAMILY 2
Windows Server 2008 R2 SP1
Supports .NET 3.5, 4.0
More details about Azure Guest OS Releases can be found in the official Azure documentation.
The ServiceConfiguration.{Environment}.cscfg was created by PowerShell when we executed the Add-AzureWorkerRole PowerShell command.
The configuration of the settings for your cloud service is determined by the values in the ServiceConfiguration.cscfg file. You specify the number of instances that you want to deploy for each role in this file. The values for the configuration settings that you defined in the service definition file are added to the service configuration file. The thumbprints for any management certificates that are associated with the cloud service are also added to the file. The Azure Service Configuration Schema (.cscfg File) provides the allowable format for a service configuration file.
The following is the unchanged version of the ServiceConfiguration.Cloud.cscfg file. Since it is missing a few pieces, I will show you what to change in order to be able to deploy your brand-new service to Microsoft Azure.
<?xml version="1.0" encoding="utf-16"?>
<ServiceConfiguration xmlns:xsd="http://www.w3.org/2001/XMLSchema"
                      xmlns:xsi="http://www.w3.org/2001/XMLSchema-instance"
                      serviceName="service-lift-and-shift"
                      osFamily="2"
                      osVersion="*"
                      xmlns="http://schemas.microsoft.com/ServiceHosting/2008/10/ServiceConfiguration">
  <Role name="ServiceWorkerRole">
    <ConfigurationSettings />
    <Instances count="1" />
    <Certificates />
  </Role>
</ServiceConfiguration>
For this example we will keep Family 2 because our Windows Service is built using .Net 2.0.
We also kept osVersion=”*” to allow the Azure Fabric to continuously patch the Guest OS.
Packaging a Windows Service as a Cloud Service
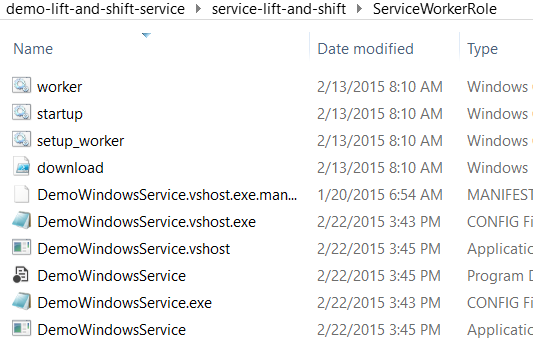
The ServiceWorkerRole folder contains the files and documents that compose our new Azure Worker Role

Place the files that compose the Windows Service in this folder.
Be sure to include the application’s dependencies such that nothing stops the application from running once it is deployed to an Azure Worker Role. If, for some reason, the application does not seem to run as expected, refer to my earlier blog post that shared techniques to investigate and debug Azure Roles.
Before we package the Azure Cloud Service, we must update the startup.cmd file. This file contains the startup script that is executed before the worker.cmd. The following is the initial version of the file.
:: Placeholder for role startup

echo SUCCESS
exit /b 0
The required updates include, installing the Windows Service and making sure that it has started by executing the startup.ps1 PowerShell script.
D:\Windows\Microsoft.NET\Framework\v2.0.50727\InstallUtil.exe /LogToConsole=false DemoWindowsService.exe

REM   Attempt to set the execution policy by using PowerShell version 2.0 syntax.
PowerShell -Version 2.0 -ExecutionPolicy Unrestricted .\startup.ps1 >> "%TEMP%\StartupLog.txt" 2>&1

IF %ERRORLEVEL% EQU -393216 (
   REM   PowerShell version 2.0 isn't available. Set the execution policy by using the PowerShell version 1.0 calling method.

   PowerShell -Command "Set-ExecutionPolicy Unrestricted" >> "%TEMP%\StartupLog.txt" 2>&1
   PowerShell .\startup.ps1 >> "%TEMP%\StartupLog.txt" 2>&1
)

REM   If an error occurred, return the errorlevel.
EXIT /B %errorlevel%

echo SUCCESS
exit /b 0
The startup.ps1 PowerShell script Starts the DemoWindowsService Windows Service. This example is basic and would benefit from much error handling. For example, we could make sure that the service exists and that it is stopped before we call the Start-Service command. Then we could verify that it has indeed started.
$srv = 'DemoWindowsService'
Start-Service -Name $srv
The worker.cmd file contains the application loop that is executed by the Azure Worker role. The generated file contains a script that blocks the execution of the host thread and makes the Azure Fabric act as if the application was running.
:workerLoop

:: Do work
ping 123.45.67.89 -n 1 -w 1000000 > nul

goto workerLoop
In order to allow the Azure Cloud Service to self heal, I recommend that add logic that monitors the state of the Windows Service. If the Windows service stops, try to start it again. If that fails, your script should end the loop and allow the command line to complete its execution. This termination even signals the Azure Fabric to recycle the Role and to self heal.
When changes are made to CMD script files, we must ensure that they are saved using the ANSI Encoding. Failing to do so may prevent the CMD script from executing.
Now that we have a Windows Service configured to be installed and executed in a Worker Role, it’s time to package the Cloud Service. In Windows PowerShell ISE and navigate back to the folder that contains the Cloud Service.
The Cloud Service for this blog post is at the following location:
C:\users\<user id>\Documents\demo-lift-and-shift-service
In the PowerShell console, execute the following commands.
# Package the Cloud Service
Save-AzureServiceProjectPackage
This produces a package named cloud_package.cspkg, which is required for the service’s deployment.

Deploying the Cloud Service
This step has a prerequisite. We must start by importing a publish profile from our Microsoft Azure Subscription. PowerShell will use it to publish our Cloud Service to our Microsoft Azure.
In the PowerShell console, execute the following commands.
# Opens a website that allows us to download the Publish Profile
# associated with our Microsoft Azure Subscription
Get-AzurePublishSettingsFile
Save the publish settings files to your downloads folder then import it using the following command.
Import-AzurePublishSettingsFile -PublishSettingsFile 'C:\Users\<user id>\Downloads\<subscription name>-credentials.publishsettings'
We are now ready to publish our brand-new Cloud Service. The following command will create a new storage account to upload our package. This is the default behavior because we did not provide a storage account for the command. We specified a name for the service, a location (datacenter), a slot (production or staging) and a deployment name. For more information about the Publish-AzureServiceProject command please refer to the official documentation.
Publish-AzureServiceProject -ServiceName 'service-lift-and-shift'
                            -Location 'East US'
                            -Slot 'Production'
                            -DeploymentName '2015-02-14-15-46'
                            -Verbose
If the Publish-AzureServiceProject command is executed with the -Verbose flag, it will produce a detailed output that allows you to understand what is happening. It’s also very useful when you need to debug a failed deployment.
WARNING: Publishing service-lift-and-shift to Microsoft Azure. This may take several minutes...
WARNING: 3:47:10 PM - Preparing runtime deployment for service 'service-lift-and-shift'
WARNING: 3:47:11 PM - Verifying storage account 'serviceliftandshift'...
WARNING: 3:47:43 PM - Preparing deployment for service-lift-and-shift with Subscription ID: dfbedef7-xxxx-xxxx-xxxx-650ca03208ee...
WARNING: 3:47:47 PM - Connecting...
WARNING: 3:47:48 PM - Creating...
WARNING: 3:47:49 PM - Created hosted service 'service-lift-and-shift'.
WARNING: 3:47:49 PM - Uploading Package to storage service serviceliftandshift...
WARNING: 3:47:56 PM - Starting...
WARNING: 3:48:30 PM - Created Deployment ID: 03e36c62a5f74d5f9ebd0a2ec0b16880.
WARNING: 3:48:30 PM - Initializing...
WARNING: 3:51:49 PM - Instance ServiceWorkerRole_IN_0 of role ServiceWorkerRole is busy.
WARNING: 3:52:22 PM - Instance ServiceWorkerRole_IN_0 of role ServiceWorkerRole is ready.

PersistentVMDowntime : Microsoft.WindowsAzure.Commands.Utilities.CloudService.Model.PersistentVMDowntimeInfo
Name                 : 2015-02-14-15-46
DeploymentSlot       : Production
PrivateID            : 03e36c62a5f74d5f9ebd0a2ec0b16880
Status               : Running
Label                : service-lift-and-shift
Configuration        : ...
RoleInstanceList     : {ServiceWorkerRole}
UpgradeStatus        :
UpgradeDomainCount   : 1
RoleList             : {ServiceWorkerRole}
SdkVersion           : 2.5.6496.10
Locked               : False
RollbackAllowed      : False
VirtualNetworkName   :
CreatedTime          : 2015-02-14 3:47:58 PM
LastModifiedTime     : 2015-02-14 3:52:23 PM
ExtendedProperties   : {}
Dns                  :
VirtualIPs           : {Microsoft.WindowsAzure.Commands.Utilities.CloudService.Model.VirtualIP}
Once the Cloud Service has completed its deployment, you can log into the https://manage.windowsazure.com portal and you will be able to monitor and alter its configurations.
Because this solution does not rely on the .NET Azure SDK and since the CMD script has an infinite loop, we do not see a recycling status for a faulted Azure Worker Role. If we observe a high CPU, which could be unexpected, it could be because the Cloud Service was deployed with the wrong Guest OS Family. This can cause the Windows Service to continuously fail to start. The CMD worker script is blocked and prevents the Cloud Service from restarting. Consequently, updating the ServiceConfiguration.Cloud.cscfg file with the correct Guest OS Family and redeploying the Cloud Service can solve the issue.
Out of curiosity, you can configured the Remote Desktop Extension through the management portal and peaked into the provisioned instance. This will allow you to validate whether the Windows Service starts as expected.
Bringing it All Together
Azure Worker Roles support a surprising variety of scenarios! Here’s a quick recap of the steps taken to Lift & Shift a Windows Service to Microsoft Azure.
# Create the Cloud Service
New-AzureServiceProject -ServiceName 'service-lift-and-shift' -Verbose

# Create the Worker Role
Add-AzureWorkerRole -Name 'ServiceWorkerRole' -Instances 1 -Verbose
Update the configurations files with the proper Guest OS Family and with the desired VM Size for your Cloud Service. Then copy the Windows Service and its dependencies to the Role’s folder. Don’t forget to update the startup.cmd script file and to add the startup.ps1 file so that the service may install the Windows Service and ensure that it is started.
# Package the Cloud Service
Save-AzureServiceProjectPackage

# Publish the Package to Microsoft Azure
Publish-AzureServiceProject -ServiceName 'service-lift-and-shift'
                            -Location 'East US'
                            -Slot 'Production'
                            -DeploymentName '2015-02-14-15-46'
                            -Verbose


Hello!
I’m working on doing exactly what you’ve described here – taking an existing Windows Service and moving it onto Azure Cloud Services. I’m running into issues with the scripts that install and run the service; the message that I am getting from the Azure dashboard currently is:
Role has encountered an error and has stopped. Application startup task “F:\approot.\startup.cmd” > startup_log.txt failed with exit code -65536.
One of the things I’m still trying to get to grips with is how the the file system works for Cloud Services – for instance, I find it very interesting that in your example above, you locate InstallUtil on D:. Do you know if anything has changed since you wrote this blog post?
cheers
Joseph
LikeLike
Hi Joseph,
Try to RDP into the Cloud Service instance and have a look.
Alex
LikeLike
Perfect – I didn’t know it was possible to RDP into Cloud Service instances. Thanks for that!
LikeLike
Have a look at this blog post to help you debug Cloud Services https://alexandrebrisebois.wordpress.com/2014/08/07/busy-starting-role-sites-were-deployed-azure-role-diagnostics/
LikeLike
Hi
I was trying to update my Guestos to family 4 and vmsize to large but I am running into trouble when I do this. It all works fine in family 2. I am not sure what the problem is even I dig all what is mentioned in https://alexandrebrisebois.wordpress.com/2014/08/07/busy-starting-role-sites-were-deployed-azure-role-diagnostics/
my startup.log file says…
E:\approot>:: Placeholder for role startup
E:\approot>D:\Windows\Microsoft.NET\Framework\v4.0.30319\InstallUtil.exe /LogToConsole=false WindowsService1.exe
Microsoft (R) .NET Framework Installation utility Version 4.0.30319.33440
Copyright (C) Microsoft Corporation. All rights reserved.
The installation failed, and the rollback has been performed.
E:\approot>REM Attempt to set the execution policy by using PowerShell version 2.0 syntax.
E:\approot>PowerShell -Version 2.0 -ExecutionPolicy Unrestricted .\startup.ps1 1>>”C:\Resources\temp\c1c5f2925ebf4cf8bffc8cd305163f65.ServiceWorkerRole\RoleTemp\StartupLog.txt” 2>&1
E:\approot>IF -65536 EQU -393216 (
REM PowerShell version 2.0 isn’t available. Set the execution policy by using the PowerShell version 1.0 calling method.
PowerShell -Command “Set-ExecutionPolicy Unrestricted” 1>>”C:\Resources\temp\c1c5f2925ebf4cf8bffc8cd305163f65.ServiceWorkerRole\RoleTemp\StartupLog.txt” 2>&1
PowerShell .\startup.ps1 1>>”C:\Resources\temp\c1c5f2925ebf4cf8bffc8cd305163f65.ServiceWorkerRole\RoleTemp\StartupLog.txt” 2>&1
)
E:\approot>REM If an error occurred, return the errorlevel.
E:\approot>EXIT /B -65536
Also I find it very strange that my service is installed but not running. there is no hint of any log where I can find what the issue is…except the following
User program “E:\approot.\startup.cmd” > startup_log.txt exited with non-zero exit code -65536. Working Directory is E:\approot.
obviously when I try to run the command
D:\Windows\Microsoft.NET\Framework\v4.0.30319\InstallUtil.exe WindowsService1.exe it shows me error that is due to the fact that service was already installed.
The installation failed, and the rollback has been performed.
PS E:\approot> D:\Windows\Microsoft.NET\Framework\v4.0.30319\InstallUtil.exe WindowsService1.exe
Microsoft (R) .NET Framework Installation utility Version 4.0.30319.33440
Copyright (C) Microsoft Corporation. All rights reserved.
Running a transacted installation.
Beginning the Install phase of the installation.
See the contents of the log file for the E:\approot\WindowsService1.exe assembly’s progress.
The file is located at E:\approot\WindowsService1.InstallLog.
Installing assembly ‘E:\approot\WindowsService1.exe’.
Affected parameters are:
logtoconsole =
logfile = E:\approot\WindowsService1.InstallLog
assemblypath = E:\approot\WindowsService1.exe
Installing service Service1…
Creating EventLog source Service1 in log Application…
An exception occurred during the Install phase.
System.ComponentModel.Win32Exception: The specified service already exists
The Rollback phase of the installation is beginning.
See the contents of the log file for the E:\approot\WindowsService1.exe assembly’s progress.
The file is located at E:\approot\WindowsService1.InstallLog.
Rolling back assembly ‘E:\approot\WindowsService1.exe’.
Affected parameters are:
logtoconsole =
logfile = E:\approot\WindowsService1.InstallLog
assemblypath = E:\approot\WindowsService1.exe
Restoring event log to previous state for source Service1.
The Rollback phase completed successfully.
The transacted install has completed.
The installation failed, and the rollback has been performed.
any help will be depply appreciated…thanks
LikeLike
What version of .Net have you built your service with?
LikeLike
I am using Visual studio 2015 to create my sample windows service (.NET 4.5.2 – I checked from the properties window of the project).
LikeLike
That’s interesting. Do you have any dependencies that require .Net 2 or 3?
LikeLike
No its just a vanila flavour service which write to event log every 1 minute. I just want to try this on windows 2012 r2 guestos.
LikeLike
Yes, I did saw the post, quite helpful but I could not find any thing for the issue I am having. Also this example is working perfectly fine in windows 2008 R2 (family 2 guestos) but when I set the guest os to family 4 from portal the role fail to provision.
LikeLike
Ok. took me w hile to get my head back into this. Make sure that you have all your dependencies copied to the package. I had an issue in the past where I wan into the same situation. I was missing some DLLs, so I made sure that my project copied all of its dependencies to the output directory. I’m happy that you found this “D:\Windows\Microsoft.NET\Framework\v4.0.30319\InstallUtil.exe” this one took a little while to figure out when I switched from .net 3 to 4.
LikeLike
An other thing I did in the past, was make a console app to run the process and see if I was missing anything on the target machine.
LikeLike
It looks like the issue is with the windows 2012 r2 security features which doesn’t allow some of the bits like access to the event log to work. I picked up the following from the service.installlog
Installing assembly ‘E:\approot\WindowsService1.exe’.
Affected parameters are:
i =
logfile = E:\approot\WindowsService1.InstallLog
assemblypath = E:\approot\WindowsService1.exe
logtoconsole =
Installing service Service1…
Service Service1 has been successfully installed.
Creating EventLog source Service1 in log Application…
Committing assembly ‘E:\approot\WindowsService1.exe’.
Affected parameters are:
i =
logfile = E:\approot\WindowsService1.InstallLog
assemblypath = E:\approot\WindowsService1.exe
logtoconsole =
Installing assembly ‘E:\approot\WindowsService1.exe’.
Affected parameters are:
i =
logfile = E:\approot\WindowsService1.InstallLog
assemblypath = E:\approot\WindowsService1.exe
logtoconsole =
Installing service Service1…
Creating EventLog source Service1 in log Application…
Rolling back assembly ‘E:\approot\WindowsService1.exe’.
so when it tried to do this step “Creating EventLog source Service1 in log Application…” it somehow fails and then the subsequent steps also fails as the service is already installed so it can’t be re-installed. So creating the eventlog requires more permission when doing the startup task I am guessing. I will dig more and if I found something I will post it.
Thanks
LikeLike
Yes a startup task with elevated privileges will help you get there.
LikeLike
Hey,
Would it be possible to host a windows service with PaaS? If so what are the complexities i need to consider.
Thanks for your help
Thanks
Bala
LikeLike
With Azure moving so quickly – just wondering if this is still the way to go for migrating a windows service to Azure? I have followed the steps and have managed to complete the tasks but had issues with some of the steps with missing components (missing scaffold files and the like – see https://stackoverflow.com/questions/36630433/azure-node-js-express-app-scaffold-xml-missing/36637228#36637228 ) which reading other more recent blogs/posts are only available on older versions of AzureRM ?
LikeLike